![]()
Bring Life to Your Living Space
![]()
Bring Life to Your Living Space

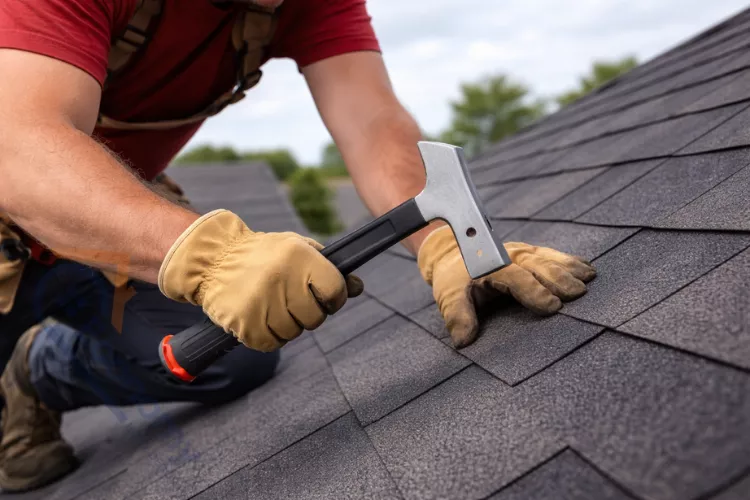
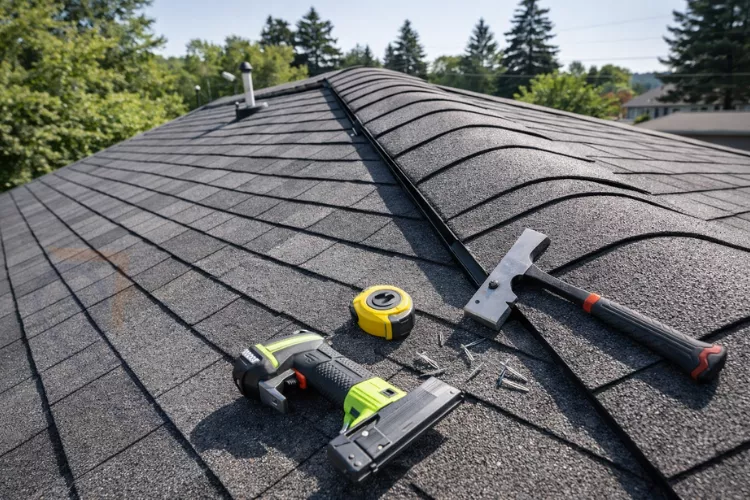
A shingling hammer, also known as a roofing hatchet, is a specialized tool designed specifically for installing asphalt shingles and performing various roofing tasks. Unlike standard hammers, this dual-purpose tool combines a striking head with an integrated cutting blade and built-in measuring gauge, making it the preferred choice for both professional roofers and DIY homeowners tackling roofing projects.
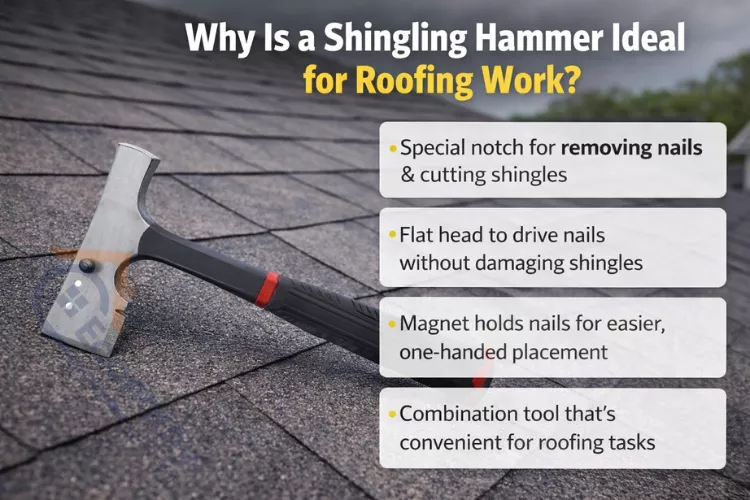
Understanding why is a shingling hammer ideal for roofing work can save you time, reduce physical strain, and significantly improve the quality of your roof installation. Whether you’re a contractor completing commercial projects or a homeowner planning a weekend repair, selecting the right roofing tools directly impacts efficiency, safety, and the longevity of your work. This comprehensive guide explores everything you need to know about shingling hammers and why they remain indispensable in modern roofing applications.
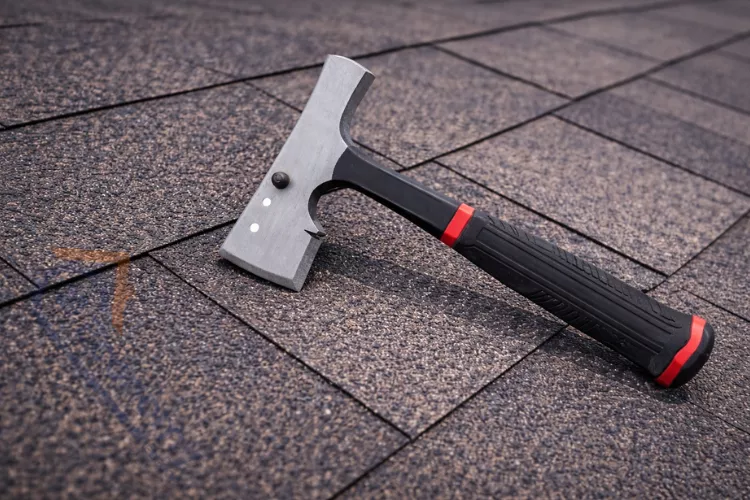
A shingling hammer is a purpose-built roofing tool that serves multiple functions in a single design. It features a striking face for driving roofing nails, a sharp hatchet blade for cutting shingles, and typically includes a built-in adjustable gauge for measuring proper shingle exposure.
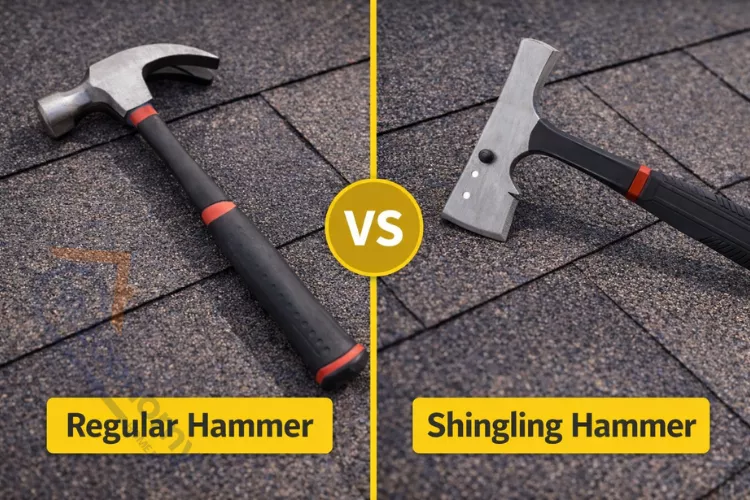
Standard claw hammers are designed for general carpentry and nail removal. Shingling hammers, however, incorporate specialized features tailored to roofing work:
Roofing hammers evolved from basic hatchets used by early tradesmen. As asphalt shingle roofing became standard in the mid-20th century, tool manufacturers recognized the need for specialized equipment. Modern shingling hammers incorporate ergonomic research, advanced materials, and decades of contractor feedback to maximize performance and reduce repetitive strain injuries.
Understanding the components that make a shingling hammer ideal for roofing work helps you appreciate its design advantages:
The magnetic head securely holds roofing nails in position, allowing single-handed operation. This feature dramatically increases installation speed and keeps your free hand available for positioning shingles or maintaining balance on steep slopes.
An adjustable aluminum or steel gauge slides along the hammer head, creating a consistent measurement tool. This ensures uniform shingle exposure (typically 5 to 5.5 inches), which is critical for proper water drainage and aesthetic appearance.
The striking face drives nails effectively while the opposite hatchet blade cleanly cuts through asphalt shingles, eliminating the need to carry separate cutting tools. The blade remains sharp through hundreds of cuts when properly maintained.
Modern shingling hammers feature rubber-coated or contoured grips that reduce hand fatigue during extended use. Vibration-dampening technology in premium models minimizes impact shock that can lead to joint problems over time.
Professional-grade hammers use forged steel heads with hardened striking faces that resist mushrooming. Handles range from traditional hickory wood to modern fiberglass and steel, each offering distinct benefits for different working conditions.

Professional roofers can install shingles 30-40% faster with a specialized roofing hammer compared to using conventional tools. The magnetic nail holder eliminates fumbling with nails, while the integrated gauge removes the need for separate measuring. On a standard residential roof, this efficiency translates to completing jobs in days rather than weeks.
Proper nail placement prevents shingle blow-offs and water infiltration. The balanced weight and magnetic positioning of shingling hammers enable consistent nail depth and angle. Over-driven nails tear through shingles, while under-driven nails create water entry points. A quality roofing hammer provides the tactile feedback needed to achieve perfect placement repeatedly.
Roofing work involves thousands of repetitive hammer swings, often while balancing on steep slopes. The lighter weight (typically 14-18 ounces) and shock-absorbing handles of shingling hammers significantly reduce arm, wrist, and shoulder strain. Less fatigue means better focus and fewer accidents on dangerous elevated work surfaces.
The built-in shingle gauge eliminates guesswork in achieving proper exposure. Consistent overlap ensures:
Quality shingling hammers from reputable manufacturers last for decades with proper care. While the initial investment may exceed basic hammers, the specialized design prevents the need for multiple tools. One roofing hammer replaces a standard hammer, utility knife, and measuring tool, offering better value and reduced tool belt weight.
Understanding the differences helps explain why professional roofers invest in specialized tools:
| Feature | Shingling Hammer | Regular Claw Hammer |
|---|---|---|
| Nail Positioning | Magnetic holder for one-handed operation | Requires holding nail with free hand |
| Shingle Cutting | Built-in blade cuts shingles instantly | Requires separate utility knife |
| Measurement | Integrated adjustable gauge | Need tape measure or separate gauge |
| Weight | 14-18 oz, optimized for overhead work | 16-20 oz, designed for horizontal striking |
| Striking Face | Textured or waffle pattern for grip | Smooth face, may slip on nail heads |
| Roofing Efficiency | Purpose-built for maximum speed | Adequate but requires extra tools |
| Price Range | $30-$120 | $15-$50 |
| Best Use | Roofing projects exclusively | General carpentry and construction |
The specialized design of shingling hammers delivers measurable productivity improvements that justify the cost difference for anyone completing multiple roofing projects.
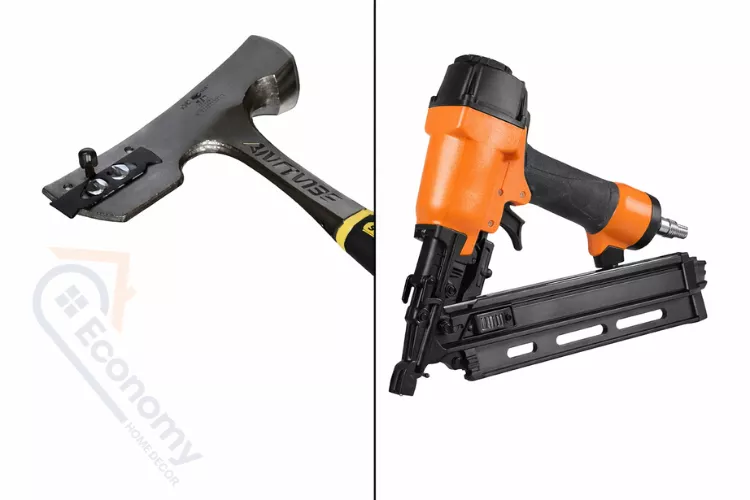
The debate between pneumatic nail guns and traditional shingling hammers continues in the roofing industry. Each tool has distinct advantages depending on project scope and working conditions.
Complete Control: Manual hammers give roofers tactile feedback for every nail, ensuring proper depth on uneven decking or around roof penetrations.
No Power Requirements: Hammers work anywhere without compressors, hoses, or batteries. This independence is crucial for remote locations or when electrical access is limited.
Lower Maintenance Costs: Nail guns require regular cleaning, lubrication, and eventual parts replacement. Hammers need only occasional blade sharpening and handle inspection.
Precision Work: Detail areas around chimneys, valleys, and edges benefit from the deliberate control of hammer installation. Nail guns can over-penetrate or miss marks in tight spaces.
Quiet Operation: Neighborhoods with noise restrictions or early-morning projects favor the relatively quiet operation of manual tools.
Large-Scale Projects: Commercial roofing or developments with dozens of identical homes justify nail gun investment through dramatic time savings.
Physical Limitations: Workers with joint issues or repetitive strain injuries may find pneumatic tools reduce physical demands.
Flat Roofs: Low-slope installations where balance isn’t a concern allow easier nail gun maneuvering.
A professional roofing nailer costs $200-$600 plus $300-$800 for a suitable compressor. Annual maintenance, hose replacements, and potential repairs add ongoing expenses. A quality shingling hammer costs $40-$100 with minimal maintenance costs over decades of use.
Experienced contractors often carry both tools but reach for their shingling hammer for:
The roofing hammer’s simplicity, reliability, and versatility ensure it remains a staple in professional tool arsenals despite technological advances.
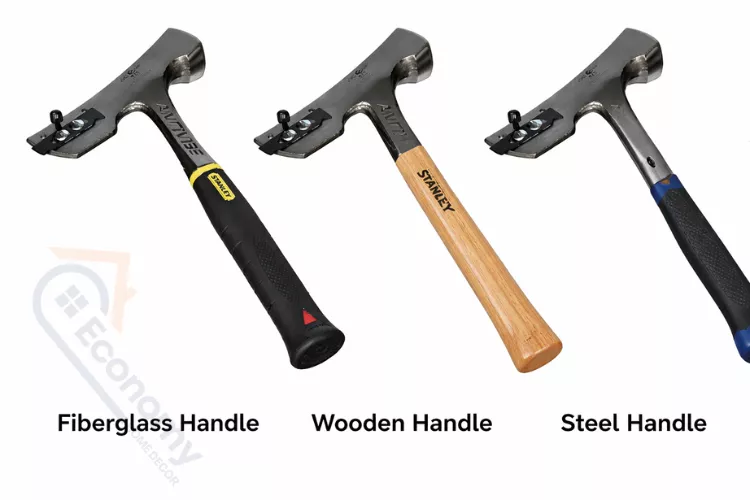
Shingling hammers come in three main handle configurations, each offering distinct performance characteristics:
Pros:
Cons:
Best For: Professional roofers working year-round in all weather conditions
Pros:
Cons:
Best For: Contractors prioritizing comfort and lightweight tools for residential work
Pros:
Cons:
Best For: DIY homeowners and traditionalists who maintain their tools properly
| Handle Type | Weight | Durability | Comfort | Maintenance | Price Range |
|---|---|---|---|---|---|
| Steel | Heavy | Excellent | Good | Minimal | $60-$120 |
| Fiberglass | Light | Very Good | Excellent | Minimal | $40-$90 |
| Wood | Medium | Good | Very Good | Regular | $30-$70 |
Proper technique maximizes efficiency while minimizing injury risk. Follow these steps for professional results:
Grip the hammer near the handle end for maximum leverage and control. Your thumb should wrap around the handle with fingers secured opposite. Avoid choking up (holding near the head) as this reduces striking power and increases wrist strain. Let the hammer’s weight do the work rather than muscular force.
Position the roofing nail against the magnetic holder, which securely maintains alignment. Place the nail approximately 6 inches from the shingle’s edge and 1 inch above the cutout, following manufacturer specifications. Strike firmly but controlled, driving the nail flush with the shingle surface without over-penetrating.
Adjust the gauge to your required exposure measurement (typically 5 to 5.5 inches for standard three-tab shingles). Hook the gauge over the previously installed shingle row. The gauge automatically positions your next shingle at the correct overlap. This consistent measurement prevents errors and speeds installation.
When trimming is needed, flip the hammer to expose the hatchet blade. Place the shingle on solid decking, score the surface with moderate pressure, then complete the cut with a firm chopping motion. Always cut away from your body and keep fingers clear of the blade path. The blade should face away when the hammer hangs from your tool belt.
Developing consistent technique takes practice but dramatically improves both speed and quality over time.

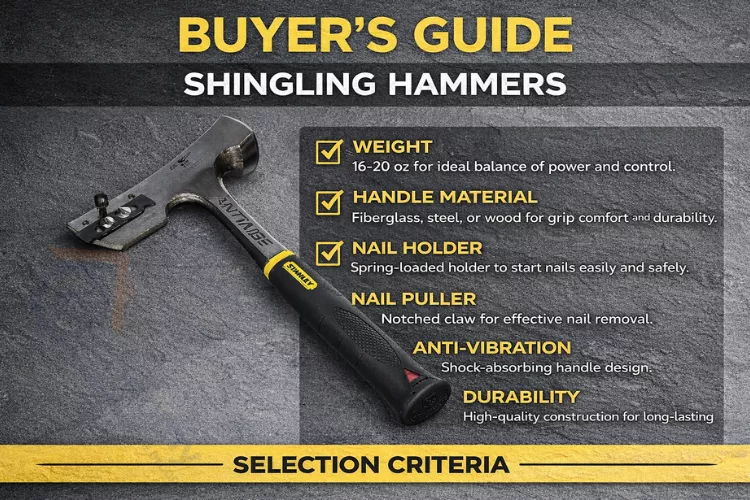
Selecting the right roofing hammer depends on several factors specific to your needs:
14-16 ounces: Ideal for DIY homeowners or contractors prioritizing reduced fatigue on smaller residential projects. Lighter hammers require more swings but cause less strain.
16-18 ounces: The sweet spot for professional roofers balancing power and endurance. Most commercial shingling hammers fall in this range.
18+ ounces: Heavy-duty options for large commercial projects where maximum driving power outweighs comfort considerations.
Test the grip before purchasing. Rubber coating should feel tacky, not slippery, and contoured sections should align comfortably with your palm. Longer handles (typically 13-15 inches) provide more leverage but may feel unwieldy on steep slopes. Consider glove thickness if you typically work with hand protection.
Weekend DIY Repairs: Budget-friendly fiberglass or wood-handled hammers ($30-$50) perform adequately for occasional use.
Full Roof Replacement: Mid-range options ($50-$80) with quality construction justify the investment for major one-time projects.
Professional Contractors: Premium hammers ($80-$120) from established brands like Estwing, Stiletto, or Vaughan deliver reliable performance through thousands of shingles and represent cost-effective business tools.
Before purchasing, verify your hammer includes:
Established tool manufacturers stand behind their products with warranties and replacement parts availability. Research reviews from professional roofing forums and contractor associations rather than relying solely on retail ratings. Fellow roofers provide the most relevant feedback about long-term durability and performance.
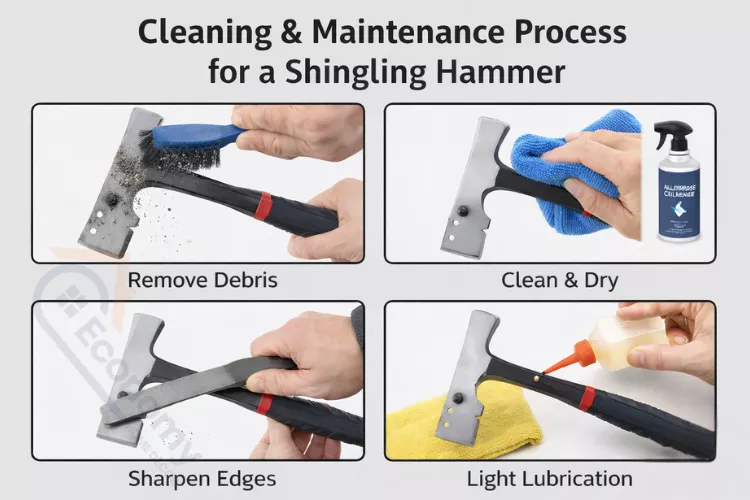
Proper maintenance extends your shingling hammer’s lifespan and maintains optimal performance:
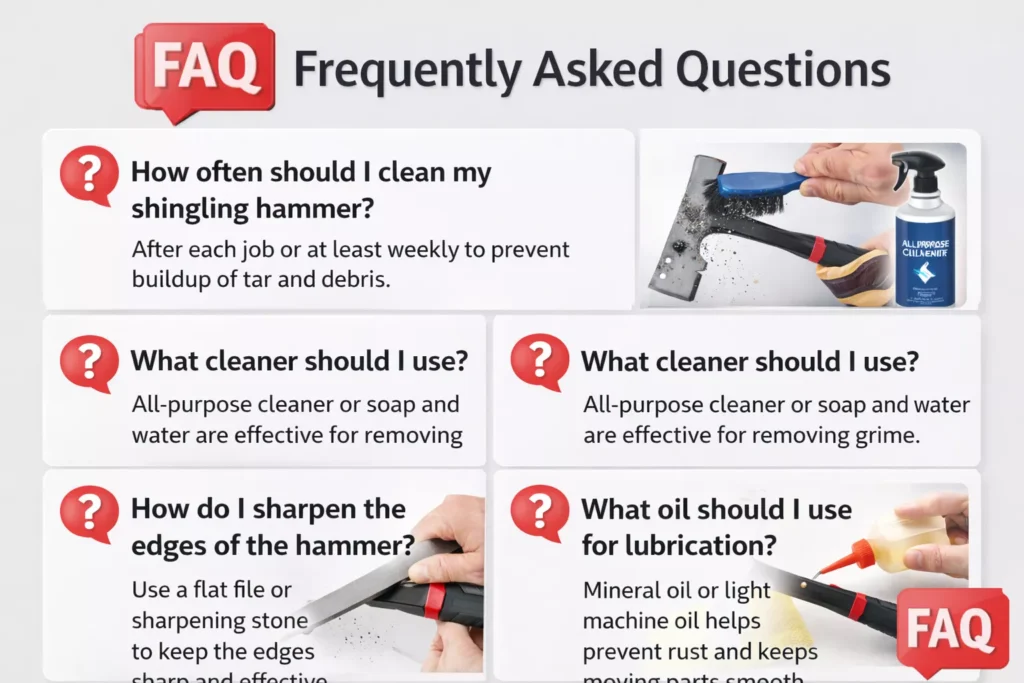
After each project, remove tar, adhesive residue, and debris from the hammer head and blade. Mineral spirits or commercial tar remover effectively dissolve stubborn buildup without damaging metal surfaces. Wipe wooden handles with a slightly damp cloth, never soaking them in water.
Store hammers in dry locations away from temperature extremes. Hang tools rather than tossing them in toolboxes where heads can loosen from impact. Apply a light coating of machine oil to metal surfaces for long-term storage to prevent rust formation.
Before each use, inspect the connection between head and handle. Tap the handle end against a solid surface—a secure fit sounds solid, while loose heads produce a rattling noise. Tighten wooden wedges or replace damaged handles immediately. Even small cracks can cause catastrophic failure during use.
Maintain blade sharpness using a mill file or bench grinder. Work at a consistent angle matching the original bevel (typically 20-25 degrees). Remove only enough metal to restore a clean edge. Over-aggressive sharpening shortens blade life and alters hammer balance. Sharpen after every 5-10 roofing squares for optimal cutting performance.
The magnetic nail holder rarely requires maintenance but can weaken over time. Clean the magnet surface regularly to remove metal particles that reduce effectiveness. If magnetism fails, some models allow magnet replacement, while others require complete head replacement.
Winter: Wooden handles contract in cold weather, potentially loosening. Check tightness frequently and consider storing indoors overnight.
Summer: Extreme heat can soften handle coatings. Avoid leaving hammers on hot roof surfaces during breaks.
A well-maintained shingling hammer provides decades of reliable service, making proper care a worthwhile investment of time.
While technically possible, regular hammers lack specialized roofing features like magnetic nail holders, built-in gauges, and cutting blades. This forces you to carry additional tools and significantly slows installation. For occasional repairs, a standard hammer works adequately, but any substantial roofing project benefits dramatically from a proper shingling hammer’s efficiency and precision.
Most professional roofers prefer 16-18 ounce hammers for optimal balance between driving power and reduced fatigue. DIY homeowners often find 14-16 ounce models more comfortable for smaller projects. Heavier hammers (18+ ounces) suit experienced contractors comfortable with additional weight in exchange for more forceful strikes.
Absolutely. DIY homeowners particularly benefit from shingling hammer features because they compensate for less experience. The built-in gauge ensures consistent shingle placement, the magnetic holder simplifies one-handed operation, and the integrated blade eliminates fumbling with separate cutting tools. For the modest cost ($30-$60 for quality models), the efficiency gains justify the investment even for single-use projects.
Quality shingling hammers from reputable manufacturers typically last 10-20+ years with proper maintenance. Professional roofers installing 100+ squares annually may replace hammers every 5-10 years due to intensive use. Handle replacement extends tool life significantly, particularly for wooden-handled models. The hammer head itself, when properly maintained, often outlasts multiple handle replacements.
The magnetic nail holder is arguably the most valuable feature for roofing efficiency. It enables one-handed operation, allowing you to position shingles with your free hand while maintaining balance on steep slopes. Without magnetism, you must hold nails manually, dramatically slowing installation and creating safety concerns. Unless budget constraints are severe, the magnetic feature is highly recommended.
Shingling hammers work for metal roofing panel installation but aren’t optimal. Metal roofing typically requires different fastener types and driving angles better suited to specialized fastening tools. The cutting blade has limited effectiveness on metal materials. For combination roofing businesses, consider dedicated tools for each material type rather than compromising with multipurpose options.
Understanding why is a shingling hammer ideal for roofing work comes down to specialized design meeting specific needs. The combination of magnetic nail positioning, integrated measuring gauges, built-in cutting capability, and ergonomic construction creates a tool perfectly adapted to asphalt shingle installation challenges.
Whether you’re a professional contractor completing dozens of roofs annually or a homeowner tackling a single replacement project, the efficiency gains, improved precision, and reduced physical strain of a proper shingling hammer justify the modest investment. While nail guns offer speed advantages on large commercial projects, the versatility, reliability, and control of a quality roofing hammer ensure it remains indispensable in modern roofing applications.
Choose a hammer appropriate to your project scope, maintain it properly, and develop correct technique. Your shoulders, wrists, and finished roof will reflect the difference this specialized tool makes. Quality roofing starts with quality tools—and few investments pay dividends as consistently as selecting the right shingling hammer for your work.