
Removing a door with self-closing hinges can seem intimidating at first, but with the right knowledge and tools, it’s actually a straightforward process that most homeowners can handle themselves. Self-closing hinges, also known as spring-loaded hinges, are designed to automatically close doors after they’ve been opened. These hinges are commonly found on commercial buildings, public restrooms, and some residential properties where automatic door closure is desired for privacy, security, or energy efficiency reasons.
Understanding how to remove door with self closing hinges is essential whether you’re planning a renovation, replacing the door, or simply need to make repairs. Unlike standard hinges, self-closing hinges contain internal spring mechanisms that create tension, making the removal process slightly more complex. However, with proper preparation and the right approach, you can safely remove these doors without damaging the hinges or the door frame.
This comprehensive guide will walk you through every step of the process, from identifying the type of self-closing hinges you’re working with to safely removing the door and preparing it for reinstallation or replacement. We’ll also cover important safety considerations, troubleshooting tips, and maintenance advice to help you complete this project successfully.
Self-Closing Hinges and Their Components
Self-closing hinges are specialized door hardware designed with internal spring mechanisms that automatically pull doors closed after they’ve been opened. These hinges serve multiple purposes in both residential and commercial settings, including maintaining privacy, improving energy efficiency, and ensuring security by preventing doors from being left open accidentally.
The primary components of self-closing hinges include the hinge body, pin, spring mechanism, and adjustment screws. The spring mechanism is what sets these hinges apart from standard hinges. This internal spring creates constant tension that pulls the door toward the closed position. The tension can usually be adjusted using small screws or mechanisms built into the hinge body, allowing you to control how quickly and firmly the door closes.
Removing a Door with Spring-Loaded Hinges requires understanding how these components work together. The spring tension means that even when you remove the hinge pin, there will still be pressure on the hinge components. This is why proper technique and safety precautions are essential when working with these types of hinges.
Different manufacturers produce various styles of self-closing hinges, but they all operate on similar principles. Some have visible spring mechanisms, while others contain the springs internally within the hinge body. Regardless of the specific design, the removal process follows similar steps, with minor variations depending on the manufacturer and model.
Essential Tools and Materials for Door Removal
Before beginning your door removal project, gathering the right tools and materials is crucial for both efficiency and safety. Having everything prepared beforehand will help you complete the task smoothly without interruptions or safety concerns.
Required tools include:
- Hammer (16-20 oz is ideal)
- Nail set or punch tool
- Adjustable wrench or pliers
- Screwdriver set (both flathead and Phillips head)
- Safety glasses
- Work gloves
- Utility knife
- Measuring tape
- Level
- Masking tape
- Pencil for marking
Additional materials you may need:
- Penetrating oil or lubricant (like WD-40)
- Wood shims
- Drop cloths or cardboard to protect flooring
- Helper (doors can be heavy and awkward to handle alone)
The quality of your tools can significantly impact the ease of the removal process. Sharp, properly maintained tools will make the job faster and safer. If you don’t own some of these tools, consider borrowing them from friends or renting them from a local hardware store rather than purchasing inferior quality tools that might make the job more difficult.
Setting up your workspace properly is equally important. Clear the area around the door, remove any obstacles, and ensure you have adequate lighting. Place drop cloths or cardboard on the floor to protect it from scratches or dropped tools. Having a helper available is highly recommended, as doors with self-closing hinges can be heavier than standard doors due to the additional hardware.
Safety Precautions When Working with Spring-Loaded Hinges
Working with self-closing hinges requires extra attention to safety due to the spring tension involved. The internal springs store significant energy, and improper handling can result in injury or damage to the door or surrounding areas. Following proper safety protocols will help ensure your project goes smoothly and safely.
Essential safety measures include:
- Always wear safety glasses to protect your eyes from flying debris or springs
- Use work gloves to protect your hands and improve grip
- Never rush the process – spring-loaded components can move unexpectedly
- Ensure proper lighting in your work area
- Keep children and pets away from the work area
- Have a first aid kit readily available
The spring tension in self-closing hinges can cause components to move suddenly when tension is released. This is particularly important to remember when removing hinge pins or adjusting spring mechanisms. Always position yourself and your tools in a way that avoids potential injury if a component moves unexpectedly.
When learning how to remove door with self closing hinges, it’s important to understand that these hinges maintain tension even when the door is open. This means you need to be prepared for the door to want to close during the removal process. Having a helper to hold the door steady while you work on the hinges is not just convenient – it’s a crucial safety measure.
Step-by-Step Guide to Removing Self-Closing Hinge Doors
The actual process of removing a door with self-closing hinges follows a specific sequence designed to safely manage the spring tension while preventing damage to the door or frame. This step-by-step approach will help ensure success regardless of your experience level with door hardware.
Step 1: Prepare the work area and door Begin by clearing the area around the door and ensuring you have adequate space to maneuver. Open the door to approximately 90 degrees and have your helper hold it steady. This position provides the best access to the hinges while maintaining control of the door.
Step 2: Identify hinge adjustment mechanisms Examine each hinge carefully to locate any adjustment screws or mechanisms. These are typically small screws on the hinge body that control spring tension. Before removal, take photos of the current settings so you can restore them later if needed.
Step 3: Reduce spring tension gradually Using the appropriate screwdriver, slowly loosen the spring tension adjustment screws. Turn them counterclockwise in small increments, testing the door’s closing action after each adjustment. The goal is to reduce tension enough to make removal easier while maintaining enough tension to prevent the door from swinging freely.
Step 4: Remove the hinge pins Starting with the bottom hinge, use your hammer and nail set to tap out the hinge pin. Work slowly and steadily, as the spring tension may cause resistance. If pins are stuck, apply penetrating oil and allow it to work for several minutes before trying again.
Dealing with Stuck or Corroded Hinge Pins
Stuck or corroded hinge pins are a common challenge when Removing a Door with Spring-Loaded Hinges. Over time, moisture, dirt, and normal wear can cause pins to become seized in their housings, making removal difficult or seemingly impossible. However, with patience and the right techniques, even the most stubborn pins can be removed safely.
Penetrating oil is your first line of defense against stuck pins. Apply a generous amount of penetrating oil (such as WD-40, Liquid Wrench, or similar products) to both the top and bottom of each hinge pin. Allow the oil to penetrate for at least 15-20 minutes, or longer for severely corroded pins. The oil will work its way into the tight spaces around the pin, helping to break down rust and corrosion.
Heat application can be effective for particularly stubborn pins. Using a hair dryer, apply gentle heat to the hinge area for several minutes. The expansion and contraction caused by heating can help break the bond between corroded surfaces. Avoid using torches or excessive heat, as this can damage the door finish or surrounding materials.
Proper pin removal technique involves using a nail set or punch that’s slightly smaller than the pin diameter. Position the punch on the bottom of the pin and tap gently with a hammer. Work in small increments, tapping lightly and checking progress frequently. If the pin doesn’t move after several attempts, reapply penetrating oil and wait longer before trying again.
Handling Different Types of Self-Closing Hinge Systems
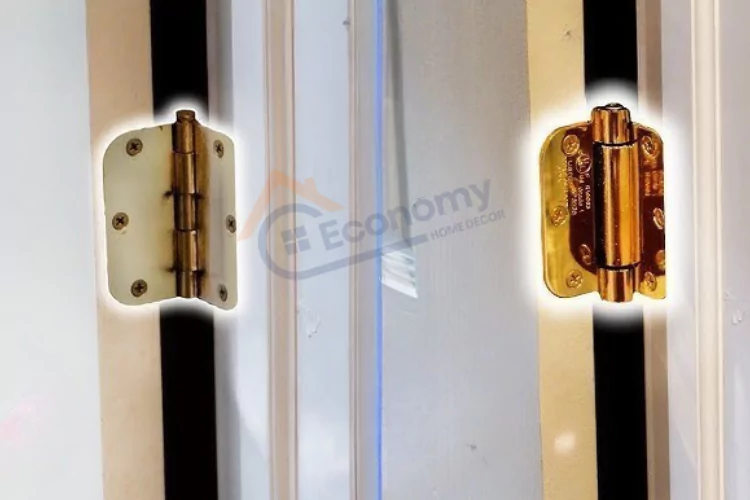
Not all self-closing hinges are created equal, and understanding the differences between various systems will help you adapt your removal technique accordingly. The most common types include spring-loaded hinges with external springs, internal spring hinges, and hydraulic door closers combined with standard hinges.
External spring hinges are the most straightforward to work with because you can see the spring mechanism. These hinges typically have a coiled spring attached to one side of the hinge, with an adjustment mechanism that controls tension. When removing doors with external spring hinges, you can often unhook or release the spring mechanism before removing the pins, making the process much easier.
Internal spring hinges contain their spring mechanisms within the hinge body itself. These are more common in residential applications because they provide a cleaner appearance without visible springs. The challenge with internal spring hinges is that you cannot visually assess the spring tension, so you must rely on feel and the door’s behavior to understand the mechanism’s state.
Hydraulic door closer systems combine standard hinges with separate hydraulic closing mechanisms mounted on the door or frame. When working with these systems, you’ll need to disconnect or remove the hydraulic closer before attempting to remove the door. This typically involves unscrewing the closer from its mounting points and carefully releasing any residual pressure in the hydraulic system.
Understanding which type of system you’re working with will help you prepare the right tools and approach for your specific situation. Take time to examine your hinges carefully before beginning the removal process.
Troubleshooting Common Problems During Removal
Even with careful planning and the right tools, you may encounter challenges when learning how to remove door with self closing hinges. Understanding common problems and their solutions will help you work through difficulties without causing damage or compromising safety.
Problem: Excessive spring tension making pin removal difficult This is perhaps the most common issue encountered during removal. If the spring tension is too high, the pins may be difficult to remove due to the pressure on the hinge components. The solution is to gradually reduce spring tension using the adjustment screws before attempting pin removal. Work slowly and make small adjustments, testing the door’s operation after each change.
Problem: Stripped adjustment screws Over-tightening or using the wrong size screwdriver can strip the small adjustment screws found on many self-closing hinges. If this happens, you may need to use screw extraction tools or carefully drill out the damaged screws. In some cases, you can still remove the door by working around the damaged adjustment mechanism, but replacement screws will be needed for reinstallation.
Problem: Door wanting to close during removal process The self-closing mechanism continues to work even during removal, which can make the process frustrating and potentially dangerous. Having a helper hold the door steady is the best solution, but you can also use door wedges or props to keep the door in position. Never try to fight against the closing action – work with it by positioning yourself and your tools appropriately.
Problem: Uneven pin removal causing binding If you remove pins in the wrong order or apply uneven pressure, the remaining pins may bind and become difficult to remove. Always start with the bottom hinge and work your way up, removing one pin completely before moving to the next hinge.
Proper Door Storage and Handling After Removal
Once you’ve successfully removed your door with self-closing hinges, proper storage and handling become crucial to prevent damage and ensure easy reinstallation. Doors are heavier and more awkward to handle than many people realize, and the additional weight from self-closing hinge hardware makes them even more challenging to manage safely.
Immediate handling considerations include having a safe place to set the door as soon as it’s removed from the hinges. Never lean a door against a wall without proper support, as it can slide and cause injury or damage. Instead, use door storage supports or create a padded, stable surface where the door can rest flat. If you must store the door vertically, ensure it’s properly supported and cannot fall.
Storage environment plays a crucial role in maintaining the door’s condition during storage. Choose a dry, temperature-controlled area away from direct sunlight and moisture. Extreme temperature changes can cause door materials to expand and contract, potentially affecting fit and finish. If storing for extended periods, wrap the door in protective material to prevent dust accumulation and scratches.
Hardware organization is often overlooked but essential for successful reinstallation. As you remove hinge pins and other hardware, place them in labeled containers or bags. Take photos of the hardware configuration before removal, and keep adjustment screws with their corresponding hinges. This attention to detail will save significant time and frustration during reinstallation.
Consider the door’s weight and size when planning storage location and duration. Solid wood doors with self-closing hinges can weigh 80 pounds or more, making them difficult to move safely without help. Plan your storage location to minimize the need to move the door multiple times.
When to Call a Professional vs. DIY Approach
Deciding whether to tackle door removal yourself or hire a professional depends on several factors including your skill level, available tools, the complexity of the hinge system, and the overall scope of your project. Understanding when professional help is warranted can save you time, money, and potential injury.
DIY is appropriate when you have basic tool skills, the hinges are in good condition without excessive corrosion, you have adequate help available, and you’re comfortable working with spring-loaded mechanisms. Most standard self-closing hinge removals fall into the DIY category, especially when following proper procedures and safety precautions.
Professional help should be considered for doors with complex hydraulic systems, hinges that are severely corroded or damaged, situations where the door frame itself needs repair or modification, or when you’re uncomfortable with any aspect of the process. Additionally, if you’re dealing with heavy commercial doors or doors in hard-to-reach locations, professional expertise may be worthwhile.
Cost considerations often factor into this decision. While professional door services may charge $100-300 for door removal depending on complexity and location, the cost of potential damage from improper DIY attempts can exceed this amount. Consider the value of your time, the risk of injury, and the potential for damage when making this decision.
Signs you should call a professional include discovering structural issues with the door frame during inspection, encountering hinge types you’re unfamiliar with, or feeling overwhelmed by the spring tension or complexity of the system. There’s no shame in recognizing when a job exceeds your comfort level or skill set.
Maintenance Tips for Self-Closing Hinges
Proper maintenance of self-closing hinges extends their lifespan, ensures smooth operation, and makes future removal or adjustment much easier. Regular maintenance also helps prevent the common problems that make door removal difficult, such as seized pins and corroded adjustment mechanisms.
Regular lubrication is the foundation of good hinge maintenance. Apply a small amount of lightweight machine oil or specialized hinge lubricant to pivot points and adjustment mechanisms every 6-12 months, or more frequently in harsh environments. Avoid over-lubrication, which can attract dirt and debris. Wipe away excess lubricant after application.
Periodic adjustment checks help maintain proper door operation and prevent excessive wear on hinge components. Test the door’s closing action regularly and make small adjustments as needed to maintain proper closing speed and force. Document your adjustment settings so you can return to known good configurations if needed.
Visual inspections should be performed several times per year, looking for signs of wear, corrosion, or damage. Pay particular attention to adjustment screws, spring mechanisms, and hinge pins. Early detection of problems allows for preventive maintenance rather than emergency repairs.
Environmental considerations affect maintenance frequency and requirements. Doors exposed to moisture, salt air, or extreme temperatures may require more frequent attention. In these environments, consider using corrosion-resistant lubricants and more frequent inspection schedules.
Cost Analysis and Budget Considerations
Understanding the costs associated with door removal projects helps you make informed decisions about DIY versus professional approaches and budget appropriately for your project. Costs can vary significantly depending on your specific situation, location, and the complexity of your door system.
DIY costs typically include tool purchases or rental, replacement hardware if needed, and materials like lubricants and protective coverings. If you already own basic tools, your out-of-pocket costs might be as low as $20-50 for supplies. However, if you need to purchase or rent specialized tools, costs can reach $100-200 or more.
Professional service costs vary by region and complexity but typically range from $100-300 for straightforward door removal. Complex systems, difficult access, or the need for repairs can increase costs significantly. Many professionals charge a service call fee in addition to labor costs, so combining multiple tasks can be cost-effective.
Hidden costs often arise during door projects and should be factored into your budget. These might include repairs to door frames, replacement of damaged hardware, or the need for additional tools or materials discovered during the project. Setting aside 20-30% of your estimated budget for unexpected expenses is prudent.
Long-term value considerations include the knowledge and experience gained from DIY projects, the potential for future savings on similar tasks, and the satisfaction of completing the work yourself. However, these benefits must be weighed against the time investment and potential risks involved.
Key Takeaways
Removing a Door with Spring-Loaded Hinges requires proper preparation, the right tools, and attention to safety. The spring tension in these hinges makes them different from standard hinges, but with the correct approach, removal is manageable for most homeowners.
Safety should always be your top priority when working with self-closing hinges. The stored energy in spring mechanisms can cause unexpected movement, making protective equipment and proper technique essential. Never rush the process or ignore safety precautions.
Tool preparation and workspace organization significantly impact project success. Having the right tools readily available and maintaining an organized workspace will make the process smoother and safer. Don’t underestimate the importance of having adequate help, especially for heavy doors.
Understanding your specific hinge type allows you to adapt general techniques to your particular situation. Take time to examine and understand your hinges before beginning removal, and don’t hesitate to research specific manufacturer recommendations.
Professional help is sometimes the best choice, particularly for complex systems or when you’re uncomfortable with any aspect of the project. The cost of professional service may be worthwhile compared to the potential for injury or damage from improper DIY attempts.
| Aspect | DIY Approach | Professional Service |
|---|---|---|
| Cost | $20-200 (tools/supplies) | $100-300+ |
| Time Required | 2-4 hours | 1-2 hours |
| Skill Level | Basic to intermediate | Expert |
| Risk Level | Moderate (with precautions) | Low |
| Learning Value | High | None |
Frequently Asked Questions
Self-closing hinges are identifiable by their spring mechanisms, which may be visible externally or contained within the hinge body. The door will automatically close when opened and released. You may also notice adjustment screws on the hinge body.
It’s generally better to reduce spring tension on all hinges before removing any pins. However, you should remove pins one hinge at a time, starting from the bottom and working up to maintain door stability.
Stripped adjustment screws can sometimes be removed with screw extraction tools. In severe cases, you may need to drill them out and replace them. The door can often still be removed by working around damaged adjustment mechanisms.
Release tension gradually until the door closes more slowly but still closes on its own. You don’t need to eliminate all tension, just reduce it enough to make pin removal manageable.
Stuck pins are usually caused by corrosion, paint buildup, or debris. Apply penetrating oil, wait 15-20 minutes, and try again. Gentle heat from a hair dryer can also help break stubborn pins free.
Yes, doors with self-closing hinges are typically heavier than standard doors due to the additional hardware. The spring tension also affects how the door feels during handling.
Yes, reinstallation generally reverses the removal process. However, you’ll need to properly adjust the spring tension after installation to ensure proper door operation.
Basic maintenance like lubrication should be performed every 6-12 months. Visual inspections should be done more frequently, especially in harsh environments.
Conclusion
Learning how to remove door with self closing hinges is a valuable skill that can save you money and give you greater control over your home maintenance projects. While these hinges present unique challenges due to their spring-loaded mechanisms, following proper procedures and safety precautions makes the process manageable for most homeowners.
The key to success lies in proper preparation, understanding your specific hinge type, and respecting the spring tension involved. Taking time to gather the right tools, set up your workspace properly, and enlist adequate help will make your project proceed smoothly and safely. Remember that rushing the process or ignoring safety precautions can lead to injury or damage that far exceeds the cost of professional service.
Whether you’re renovating your home, replacing doors, or simply need to make repairs, the skills and knowledge gained from this guide will serve you well. Regular maintenance of your self-closing hinges will prevent many of the problems that make removal difficult, ensuring that future projects go even more smoothly.
Don’t hesitate to call a professional if you encounter problems beyond your comfort level or if your specific situation involves complex systems or potential safety hazards. The goal is always to complete your project safely and successfully, whether that means doing it yourself or recognizing when expert help is the best choice.